Images and figures
Images
MyST Markdown provides a few different syntaxes for including images in your documents, as explained below.
The first is the standard Markdown syntax, by which
results in

This will correctly copy the image to the build folder and will render it in all output formats (HTML, TeX, etc). However, it is limited in the configuration that can be applied. For example, the image width cannot be set with this syntax.
As discussed in this section, MyST allows for directives such as image and figure to be used (see the Sphinx documentation for available options).
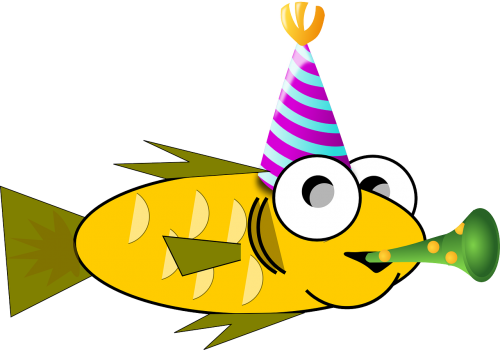
As an example,
```{image} ../images/fun-fish.png
:alt: fishy
:class: bg-primary
:width: 200px
:align: center
```
will include the following customized figure:
These directives allow you to control aspects of the image with directive arguments.
In one way, this is an improvement over the Markdown syntax. However, the drawback is that this syntax will not show the image in common Markdown viewers (for example when the files are viewed on GitHub).
A workaround is to use HTML directly, which can also be parsed as MyST Markdown.
Using raw HTML is usually a bad choice (see this explanation),
but enabling extended syntax in your _config enables MySt-Parser to properly handle isolated img tags.
Setting
parse:
  myst_extended_syntax: true
in your _config.yml and writing
<img src="../images/fun-fish.png" alt="fishy" class="bg-primary" width="200px">
will correctly render

This will also be output in PDF LaTeX builds!
Allowed attributes are equivalent to the image directive: src, alt, class, width and height.
Any other attributes will be ignored.
Supported image formats
Standard rasterized image formats, such as .png and jpg, are supported for both HTML and LaTeX/PDF output formats.
By contrast, vector formats such as .svg, .pdf and .eps are normally builder specific.
See the supported_image_types specification for each Sphinx builder here.
To support multiple builders, Jupyter Book allows you to use a * asterisk as the extension. For example, with the HTML
<img src="../images/fun-fish.*" alt="fishy" class="bg-primary mb-1" width="200px">
all images matching the provided pattern will then be searched for and each builder chooses the best image out of the available candidates.
The code above produced the following image:

You can use a tool such as imagemagick, to convert your images to multiple formats prior to building your book.
Alternatively, you may wish to check out these Sphinx extensions:
sphinx.ext.imgconverter
Figures
MyST Markdown also lets you include figures in your page. Figures are like images, except that they are easier to reference elsewhere in your book, and they include things like captions. To include a figure, use this syntax:
```{figure} ../images/C-3PO_droid.png
---
height: 150px
name: directive-fig
---
Here is my figure caption!
```
which will produce the following:
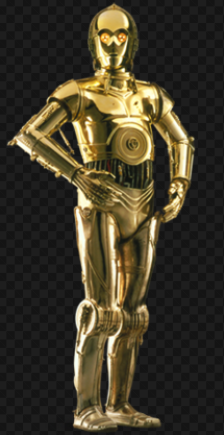
Fig. 4 Here is my figure caption!
:::{note} You can also include figures that were generated by your code in notebooks. To do so, see Insert code outputs into page content. :::
Markdown figures
Markdown figures combine colon style admonitions and HTML image parsing, to produce a “Markdown friendly” syntax for figures,
with equivalent behaviour to the figure directive above.
To enable them, add this to your _config.yml file:
parse:
  myst_extended_syntax: true
The figure block must contain only two components; an image, in either Markdown or HTML syntax, and a single paragraph for the caption.
As with admonitions, the figure can have additional classes set. The “title” of the admonition is used as the label that can be targeted by your cross-references.
For example, the code
:::{figure,myclass} markdown-fig
<img src="../images/fun-fish.png" alt="fishy" class="bg-primary mb-1" width="200px">

This is a caption in **Markdown**!
:::
generates this figure:
:::{figure,myclass} markdown-fig
This is a caption in Markdown! :::
As we see here, we can reference the figure:
Go to the fish!
We just have to use the title of the admonition as target:
[Go to the fish!](markdown-fig)
Referencing figures
You can then refer to your figures by using the {ref} role or Markdown style references like:
- {ref}`directive-fig`
- [](markdown-fig)
which will replace the reference with the figure caption like so:
Numbered references
Another convenient way to create cross-references is with the {numref} role,
which referes to the labelled objects by the numbers they automatically get.
For example, {numref}`directive-fig` will produce a reference like: Fig. 4.
If an explicit text is provided, this caption will serve as the title of the reference. For example,
- {ref}`Fly to the droid <directive-fig>`
- [Swim to the fish](markdown-fig)
produces the following cross-references:
Swim to the fish
With numref you can also access the figure number and caption individually:
the sequences “%s” and “{number}” will be replaced with the figure number, while “{name}” will be replaced with the figure caption.
For example, {numref}`Figure {number}: {name} <directive-fig>` will produce Figure 4: Here is my figure caption!.
Margin captions and figures
You can include a figure caption on the margin using :figclass: margin-caption, as seen in Fig. 5:

Fig. 5 Here is my figure caption!
Another option is to include figures on the margin by using :figclass: margin as seen in Fig. 6:
Fig. 6 Here is my figure caption!
Figure scaling and aligning
Figures can also be aligned by using the option :align: right or :align: left. By default, figures are aligned to the center (see Fig. 4).
To align a figure on the left, you’d write
```{figure} ../images/cool.jpg
---
scale: 50%
align: left
---
Here is my figure caption!
```
to get
Fig. 7 Here is my figure caption!
Similarly, if you write
```{figure} ../images/cool.jpg
---
scale: 50%
align: right
---
Here is my figure caption!
```
your figure becomes right-aligned:
Fig. 8 Here is my figure caption!
Figure parameters
The following options are supported:
scale : integer percentage
: Uniformly scale the figure. The default is “100” which indicates no scaling. The symbol “%” is optional.
width : length or percentage
: You can set the figure width in the following units: “em”, “ex”, “px”,”in” ,”cm”, “mm”, “pt”, “pc”, “%”.
height : length
: You can set the figure height in the following units: “em”, “ex”, “px”, “in”, “cm”, “mm”, “pt”, “pc”.
alt : text
: Text to be displayed if the figure cannot be displayed or if the reader is using assistive technologies. Generally entails a short description of the figure.
align : “left”, “center”, or “right”
: Align the figure left, center, or right. Default alignment is center.
name : text
: A unique identifier for your figure that you can use to reference it with {ref} or {numref} roles. Cannot contain spaces or special characters.
figclass : text
: Value of the figure’s class attribute which can be used to add custom CSS or JavaScript. Predefined options include:
“margin” : Display figure on the margin
“margin-caption” : Display figure caption on the margin